Welcome to Barbara Joyce's Blog
March 26, 2011
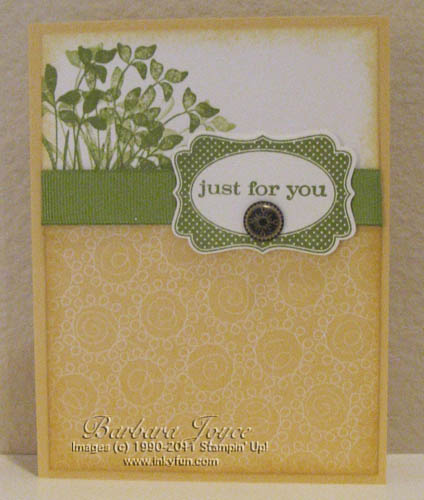
The inspiration for this card came from Splitcoast Stampers. My version is a little
different, though. I made this card for my brother-in-law's birthday. It uses the set,
"Just Believe," some So Saffron cardstock, Old Olive grosgrain ribbon, and a bit
of retired DS paper, plus the great new stamp set, "Four Frames," which
fits the Decorative Label punch perfectly!
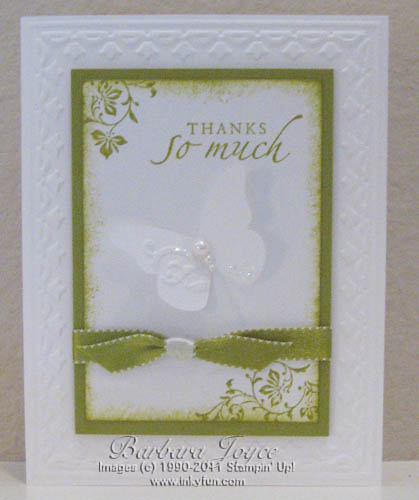
March 23, 2011
My birthday was last week. Three of my closest friends gave me lovely gifts, so
I made three of this card for my thank you notes. Now that Kiwi Kiss has been retired
for over a year, I've decided a might like it a bit after all!
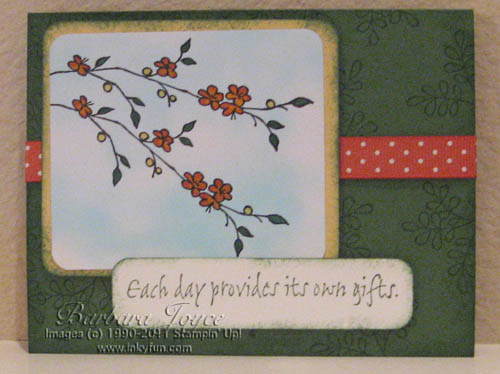
March 20, 2011
Well, I finally broke down and bought a kit so that I could airbrush with my
Copic markers. I used it for the sky in this card, and I really like the effect.
At the moment, I'm using it with canned air, but I can see that's going to get expensive.
Now I'm wondering how long it'll be before I spring for an air compressor. ;-)
This card was made with one of my favorite retired sets, "Artfully Asian."
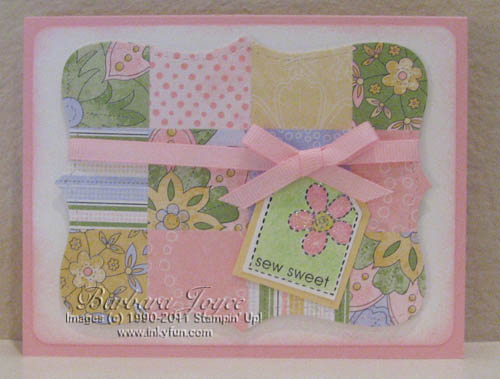
March 15, 2011
I have three new things for you today! First, the card I made for my friend, Marianne's birthday. She's
learning how to quilt, so this card seemed quite appropriate.
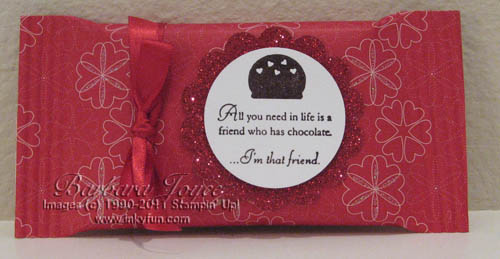
Next, two yummies! Stampin' Up! has come out with a new set called "Eat Chocolate,"
which I love (Chocolate, and the set!). The first is a gift I made for my DH for Valentine's Day.
It's a Kit-Kat bar, wrapped in Designer Series paper and decorated. Just use a 6" square of
paper, wrap it around, put some Sticky Strip in the edges, and crimp!
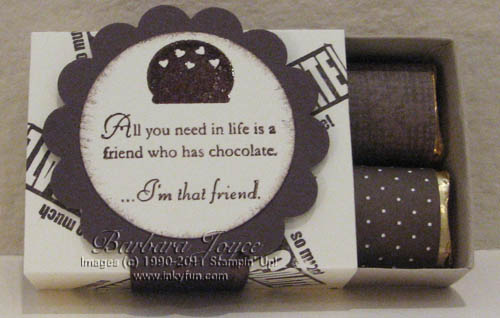
Next, a cute treat made with the same set and the Big Shot and Matchbox Die. The box
contains 4 decorated Hershey's Nuggets.
March 1, 2011
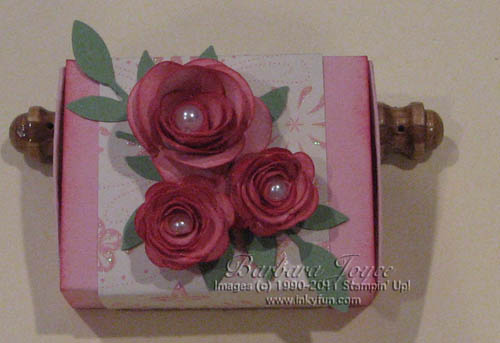
Thank goodness March is finally here. I am so tired of winter! I made this
little box for my friend, Nylene, who celebrated her 98th birthday last month.
The card I made for her is shown in the February 11 post. This box was made with
my Big Shot, the Stampin' Up! Matchbox Die, the Little Leaves Sizzlet die, and the
(non-SU) Sizzix 3-D Flowers die. I used a small piece of the Sending Love retired
Designer Series paper, and sponged the heck out of the box and the flowers. A few
little pearls finished it off. The box contains 4 Hershey's Nuggets, wrapped in more DS
paper.
February 20, 2011
Yay, me! Posts two days in a row!
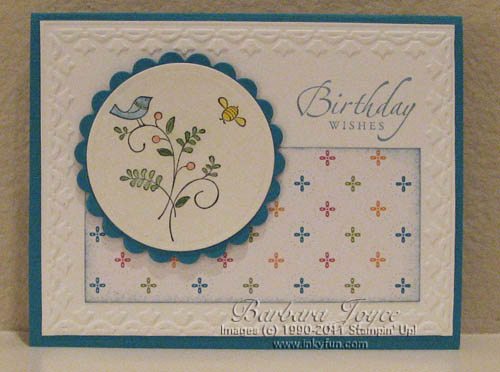
This card uses one of the free sets that you can get with a $50 order during Sale-A-Bration.
It's called "Sweet Summer." It also features a new embossing folder called
"Framed Tulips," some retired Designer Series Paper, and the circles were
cut out with Nestabilities.
February 19, 2011
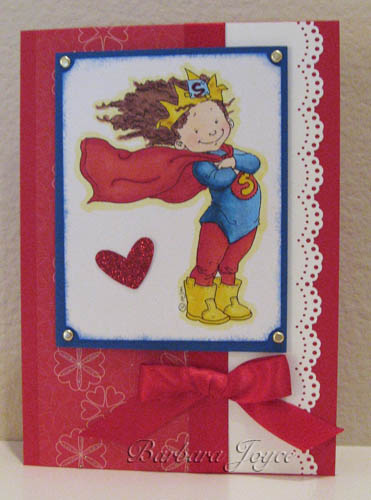
Another of Mo Manning's wonderful digital images, this time, Superduper Girl. This card
is for my 11-year old granddaughter, who is fighting a bad virus at the moment. Meg looks
just like this image, long, curly hair and all; and she is superduper!
February 11, 2011
Here's that cute owl punch again! This time I combined him with the new set, Valentine
Defined, and used some of that Glimmer Paper, both in the Occasions mini. This is a
birthday card for my friend, Nylene, who will be 98 years old (yes, you read that
correctly!) tomorrow. She is absolutely amazing!

February 1, 2011
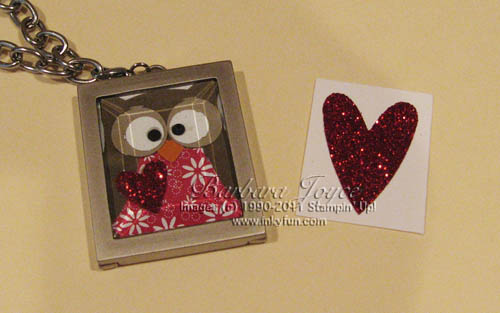
Just in time for Valentine's Day, here's a cute insert for my Simply Adorned
Locket, made with the Owl Punch, the Heart-to-Heart punch and that wonderful new Glimmer Paper
from the Occasions mini. The reverse side is shown on the right, just a big, sparkly heart!
January 26, 2011
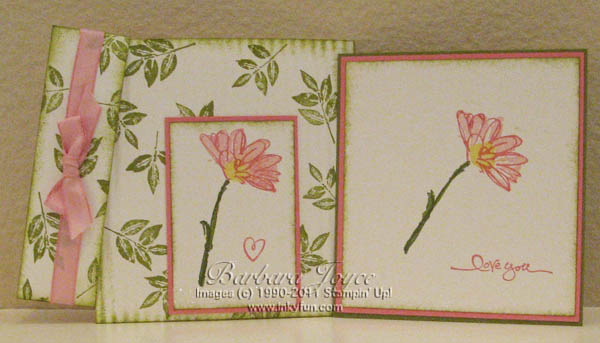
I have wanted to try a "Crimped Envelope Card" for quite a while, but hadn't gotten
around to it until today. I used a retired set, Petal Prints, as well as Old Olive, Pretty in Pink,
Regal Rose, and Whisper White cardstocks and inks. To make a Crimped Envelope Card, you seal a
regular envelope, then cut off 1-1/4" from one of the short sides. Decorate the envelope (in this
case I used the leaf stamp all over it), then run it through the crimper. The crimping process makes
the envelope just small enough that the (uncrimped!) 1-1/4" piece fits on it perfectly. The second picture
shows the card insert that goes inside. The inside
piece is 4"x 4-1/4", with smaller pieces layered on it. It was really fun to make!

Newer Posts Older Posts
|