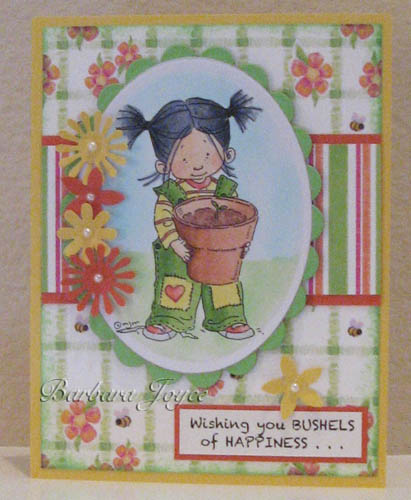
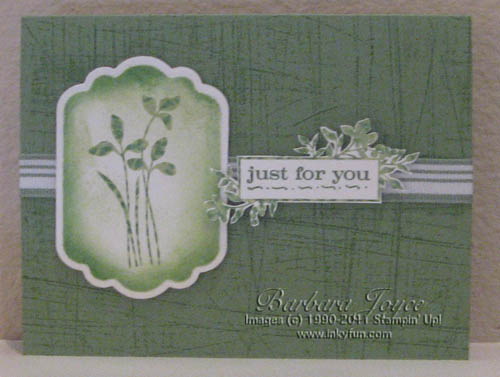
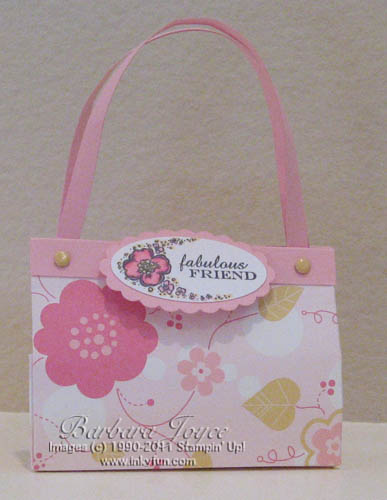
Welcome to Barbara Joyce's Blog
December 26, 2011
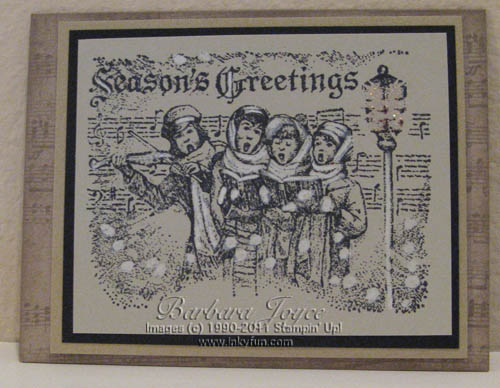
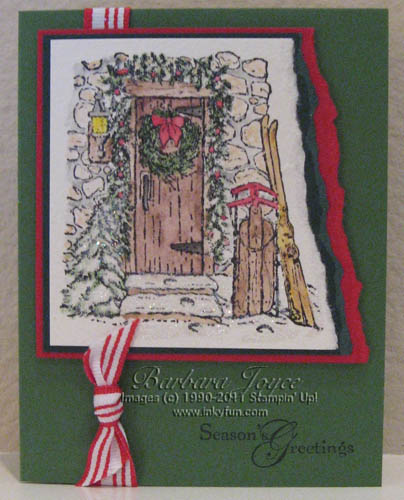
Here's another card I made this year--only one of them, but a good prototype for next
year. The image is stamped on Sahara Sand cardstock with Memento Tuxedo Black ink, then embellished
with white Prismacolor pencil and a little glitter. The layers are Basic Black and metallic Gold.
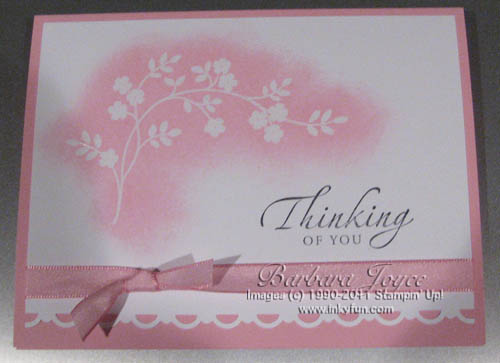
The base card is Crumb Cake, rolled with the music wheel from SU, and the edges are sponged
in Crumb Cake ink.
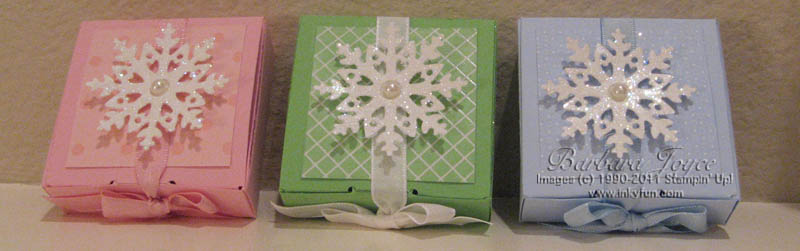
Three of my friends and I exchange Christmas gifts. This year I bought earrings for them, almost the
same, but one pair in pink, one pair in green, and one pair in blue. Each pair got its own box, in the
same color. I made these with the Bitty Box die. Snowflakes were made with the Northern Frost strip, 2-way
glue and Dazzling Diamonds glitter.
December 20, 2011
I've finally gotten all my Christmas cards in the mail, and will be posting
pictures in the next few days. I was very behind again this year, and being sick last week
didn't help get things done! In 2012, I am confident I'll have it easier, because this year
instead of making 30 of one card, I made lots of different cards and kept track of who got
what. So starting in January, I'll just start making duplicates of some that I've already designed.
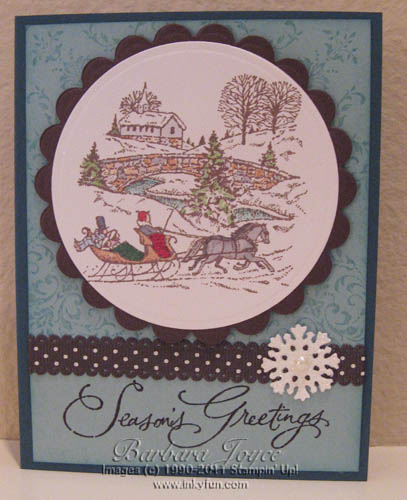
Here's a card made with a retired set called "Sleigh Bells Ring." I stamped the image
with Memento Brown ink and colored it with Copic markers. The sentiment is from "Many
Merry Messages," and the circles are cut with Nestabilities. The background flourish
is from the set, "Bliss."
November 21, 2011
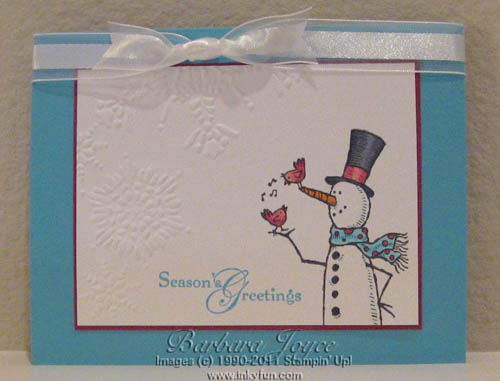
Another Christmas card! This one uses the adorable stamp set, "Snow Much Fun." I colored the
snowman with my beloved Copic Markers--quick and easy!
November 15, 2011
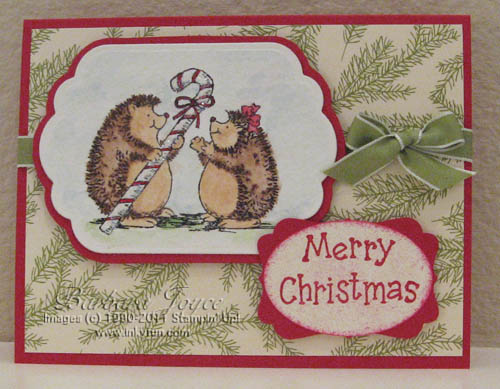
This must be a new, all-time record! Three new cards in one day! My lace guild is having a silent
auction this Saturday, and since the hedgehog is the mascot of bobbin lacemakers, I decided to make
a few cards to help raise money for the group. The stamps from these sets are retired, but I'll never give them
up. They are just so cute! The first two are from "Hedgehog Happiness," and the Christmas card is
from "Holiday Hedgehogs."


November 14, 2011
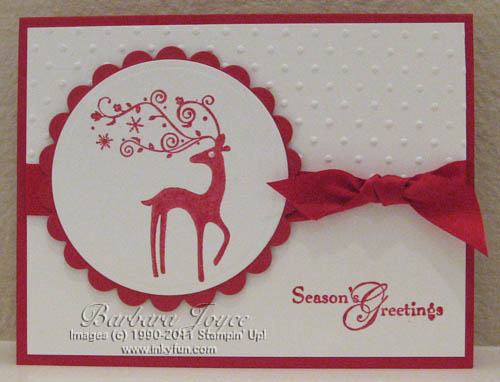
I have been busy designing and making Christmas cards. Progress is verrrrrrry slooooooow! Time's getting
short, so I decided I needed to whip up a pretty, but quick and easy card to send to most of the people
on our list. This is what I've come up with so far. The reindeer is a stamp called "Dasher," and the
circles were cut with Nestabilities dies. I used a SU embossing folder and SU satin ribbon. The sentiment is
from "Snow Swirled."
October 23, 2011
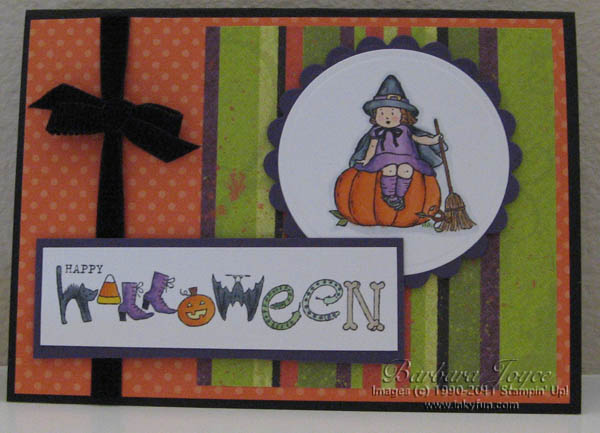
Two cards today! The first is for Cathy & Tom, since Cathy talked me into getting this cute
stamp with the Halloween symbols on it. This card ended up being 5" x 7". I colored all the images with
Copic markers.
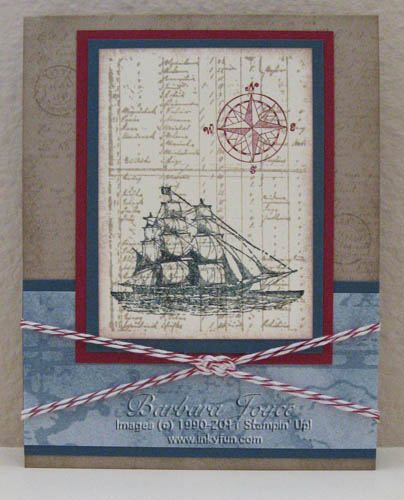
I love this set, "The Open Sea," but hadn't had a chance to ink it up until now. This card is for
our friend, Dave. He has a sailboat--not like this one!--so I hope he likes this card. The ship is heat
embossed, so it is raised and shiny.
October 18, 2011
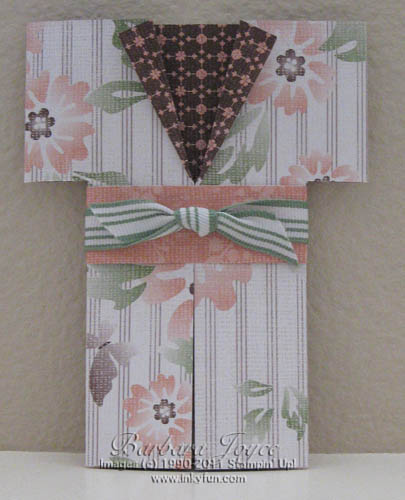
The idea for this Kimono card came from Dawn Olchefske.
It's for my older granddaughter's birthday.
October 12, 2011
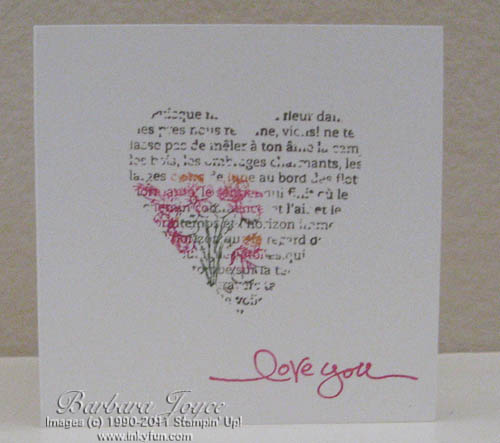
Another "Hope You Can Cling To" challenge card. Today the challenge is to use at
least one heart on your card. I thought the sentiment on this card was perfect for this cause.

October 11, 2011
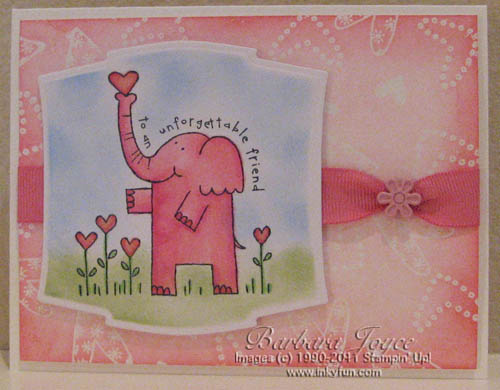
For the second year, Splitcoast Stampers is partnering with MD Anderson Cancer Center in
Houston, TX, this month. Hundreds of stampers are making cards to send to the Center. These will be used by
patients and their families. To add to the fun, there is a new challenge each day, to get our
creative juices flowing.
My first card uses the retired SU set, Happy Heart Day. The challenge for this card was
to use any critter, but it had to be pink! So here's a pink elephant!
My second card today uses the same set. This card is for the challenge to use pink and ribbon, and
to have a friendship theme. Check, check and check!
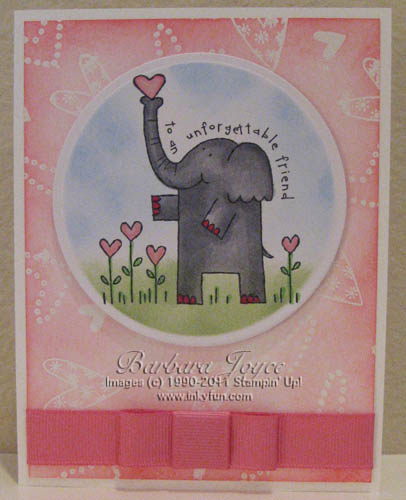
Both of these cards use "Emboss Resist" for the background, and the focal images
are cut with Nestabilities.
September 20, 2011
I needed to make a quick note today, so pulled out my "Charming" stamp set, some markers,
and a couple of scraps of paper, and this is what I came up with. Sponging around the edges of the focal
image really adds a lot to a card! I stamped the words with Certainly Celery, then used the direct-to-rubber
technique with the Rich Razzleberry and Old Olive markers, and sponged around the image with Certainly Celery,
then just the very edges with Old Olive.
September 13, 2011
Each Saturday, the Stamping 411 blog hosts a sketch challenge.
All to often, I don't find time to play. They require only SU supplies, so if I want to use my Copic markers or
Nestabilities, I can't post it there. But today I decided to go SUO (Stampin' Up! Only) and play along.
Here are the sketch I used. and the card I made.
September 10, 2011
I got a lot of inspiration from Splitcoast Stampers today! First the Saturday Inspiration Challenge. Each
Saturday, they post a website with beautiful things (usually for sale), and the challenge is to make a card
inspired by something on the featured site. This card was
my inspiration for a little 3" x 3" love note.
Also, each week SCS features a clever project or technique, complete with a free tutorial. This
week, the project was a "Petal Card." It was easier than it looks! Here's the outside, and the inside.

September 5, 2011
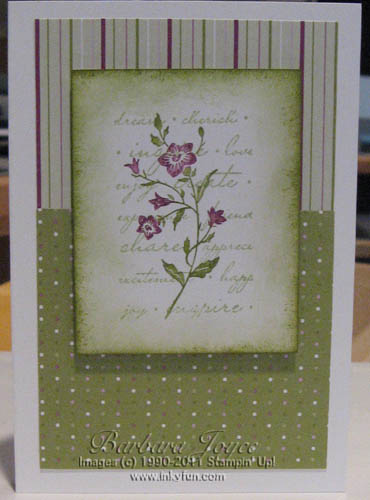
Here's another version of the next card. I like this one better--the Old Olive seems
prettier to me than the Chocolate Chip, and two different patterned papers. This card
uses the set, "Petite Pairs." The set features several sentiments for the
front of the card and coordinating sentiments for the inside. The inside of this
card says "to heal your heart." Yet, I still don't like making sympathy cards.
August 19, 2011
Last night I saw a card on Splitcoast made by Karen Barber. It was gorgeous, and she mentioned
that she had a tutorial on her blog to show how the coloring technique was done. I went right over
there, and was wowed by her beautiful work. Reading the tutorial was fun, too! If you want to see,
go to her website and look at the August 1, 2011,
post. After I tried a sample using the same stamp, I decided to branch out and try a different
image, using the same colors and technique. I'm reasonably happy with the card, but thrilled with the technique.
Markers used: Pink Pirouette, Blushing Bride, Regal Rose, Melon Mambo, Pear Pizzaz, Wild Wasabi, Old Olive, and for
the background highlighting, Barely Banana, which sadly, is retired. I also sponged with Blushing Bride and lightly
on the edge with Chocolate Chip. Oh, and of course a white Gel Pen!
August 17, 2011
I received a SU! order today, and am about to go play. I might have a card to post later.
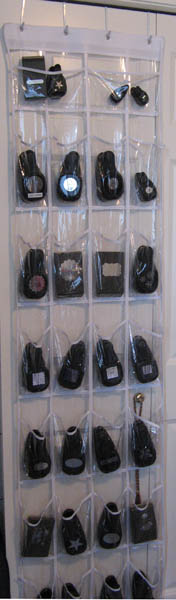
Meanwhile, I wanted to show you my new solution for organizing my punches. This is a clear
shoe bag that goes over the door. Not an original idea, so I can say it's sooo clever!
July 31, 2011
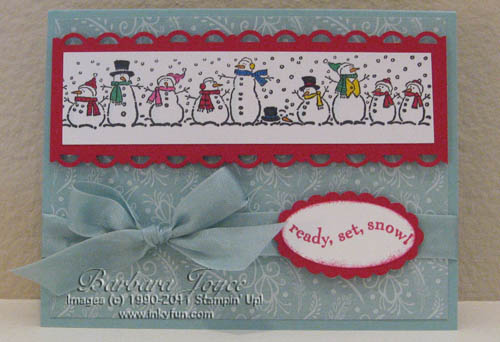
I'm playing along with a week of challenges at Splitcoast. This one is to make a Christmas
card. I am so behind on making this year's cards, it's great to get a little nudge. I love
the wheel I used for this card, but I've hardly used it. I'm pretty happy with the results. Look
at what happened to the fifth snowman from the right. Ack!
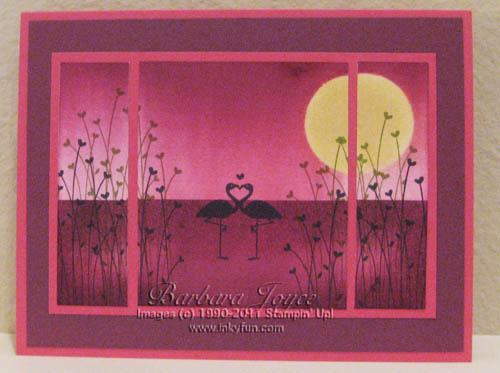
July 30, 2011
An anniversary card for my sister and brother-in-law, and also an entry in the Dare To
Get Dirty challenges on Splitcoast Stampers. The stamp is called "Just Next to You" by
Penny Black Stamps.
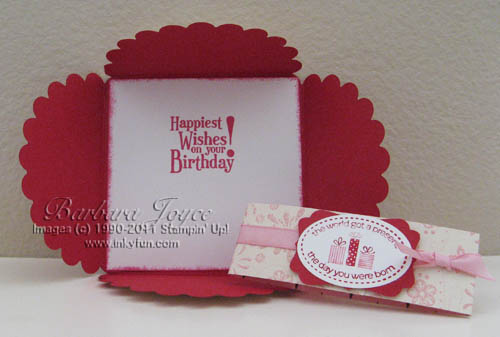
July 25, 2011
A gift card holder! The ribbon unties, and inside there is a little pocket for a gift card. Dawn's
video that shows how to make the card is
here.

July 22, 2011
Wow! It's been over a month since I posted. I have been busy with a bobbin lace
workshop and other activities, but the birthdays of two of my dearest, most
long-standing (not oldest!) friends are coming up, so I needed to get busy. This is another adorable
design from the talented artist, Mo Manning, called "The Damsel." The insides differ
slightly but are variations on the theme of "Ooooohhh, Noooooo, Not Another Birthday!"
June 12, 2011
I've been having a lot of fun with the Fun Flowers Die! This flower on this card was made using the smallest
flower on that die, 2 cuts of Melon Mambo and 2 cuts of Rose Red. Then I used the "faux suede" technique.
You run the cardstock over the edge of a table or use your bone folder to break down the fibers of the cardstock.
When you've worked it enough, the 2 layers of the cardstock can be gently peeled apart, revealing a fuzzy, matte
finish on the inside. In this case, you now have 4 of each color. Crumple them up in your hands, then carefully
unfold, and put a brad through the centers of all, alternating the colors, and being sure to keep the suede side
up. The leaves are made with one cut of the medium flower, in Always Artichoke.

June 2, 2011
Our 48th wedding anniversary is coming up in just a few days. I made this card for my DH, and
he helped me with it! Sort of takes the surprise out of it, but in the process I induced him to
adjust our cutting board so that it is even more accurate than it was before. Thanks, hon!
This card is an exact copy of a card designed by the ever-so-talented Michelle Zindorf. Visit her
blog to see more of her beautiful designs.
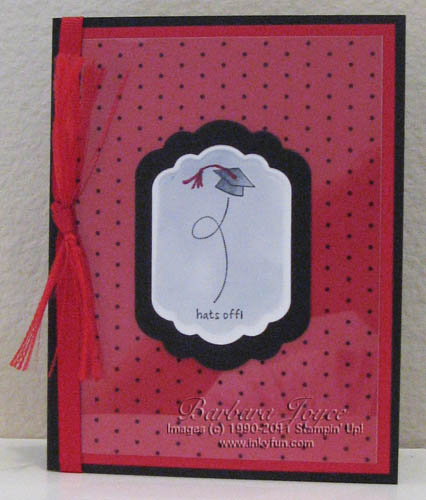
May 31, 2011
The daughter of my friend, Sue, is graduating from college with a degree in nursing. Quite an
accomplishment! The card has an overlay of clear acrylic, with black dots, and even without
a flash, the surface looks strange in the photo. Much better in "real life!" Inside there's a little envelope
that contains a gift card.
May 22, 2011
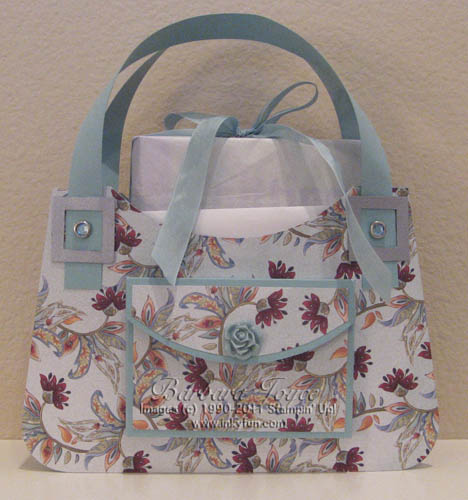
Tomorrow is the birthday of my friend, Judy. I'm giving her a small book, and wanted to wrap it in
a special way, since I know she appreciates my papercrafting creations. The DS paper is a sneak peek from
the new 2011-2012 Idea Book & Catalog that will be out in just a few weeks. The cardstock is Baja Breeze.
Directions for the purse were created by Becky Roberts. You can order the directions for your own
Purse-onally Perfect Purse
here.
May 10, 2011
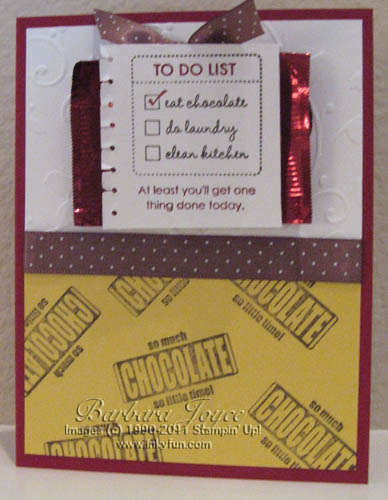
I'm still having fun with the "Eat Chocolate" set, and today devised a way to get a piece of
Ghirardelli chocolate onto the card so it can be removed without destroying the card. The ribbon makes
a loop that the chocolate slides into. The ribbon is attached to the card and decoration, but the candy is not.
I don't have the Spiral punch, so I fudged with a 1/16" punch and scissors to make it look as though it
had been torn out of a notebook.
April 29, 2011
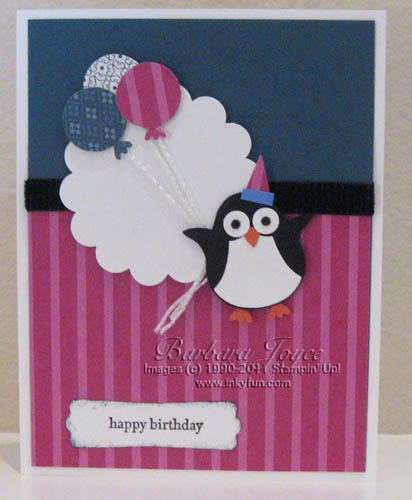
Yesterday on Splitcoast Stampers, I saw a very cute card where the designer had used
the SU Owl Punch to make a penguin holding balloons. I thought it was an inspired idea, and
CASEd it for this card, which is slightly different from the original.
April 25, 2011
I tried a new technique for this card, and although I like the card OK, I didn't do a great job
with the technique. That's because I tried rearranging the steps, never a good thing! This is a get well
card for a friend.
April 24, 2011
Last Christmas I found myself in need of about 30 cards and had only a couple of weeks to get
them made. Not good. I promised myself I would complete 3 cards each month this year, beginning
in January. Well, here we are on Easter, and how many cards did I have done? You guessed it, ZERO!
OK, to work! Today I made two of this card, which is a very close copy of one that was in the Holiday
brochure a couple of years ago. It uses the set, "Home for Christmas," which I love. It's
wintry and inviting, without being overly religious. The main image was stamped with StazOn ink
onto watercolor paper, and then colored with Watercolor Wonder Crayons and an Aqua Painter. Cardstock
colors are Handsome Hunter (retired), Real Red, and Garden Green. As a finishing touch, I dabbed
Two-Way Glue onto the white/snowy places, and then sprinkled with glitter.
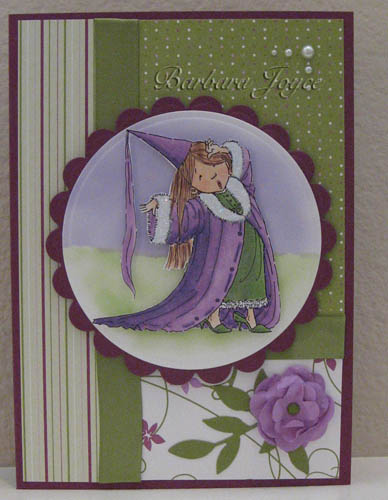
April 23, 2011
Even though not SU, this has got to be one of my favorite ever cards! So much so that my DH
kiddingly said I should send it to my friend, Laura, with the message that she can have it for
two weeks, then she has to give it back to me. No, not really, but I am going to make a duplicate
for my "collection." Happy Birthday, Laura!
This cute little girl is called "Sprout," and is the creation of the very talented
Mo Manning. The background paper is a digital download, also from Mo. I just love her work, and
also love coloring her little people with my Copic markers.
April 21, 2011
I saw a great technique on Gina K.'s Stamp TV. She showed "Thumping." You pick 2 or more
colors, and stamp your solid image onto the lightest ink pad. Then using the brush end of darker
markers, you randomly thump the color onto the rubber. Huff on the rubber to re-moisten it, and stamp.
I also used Nestabilities to cut out the main image, then embossed it in my Big Shot, and sponged
the edges while it was still in the die, which gives this nice white edge. My colors are Certainly
Celery, Wild Wasabi, and Garden Green. I sponged with Wild Wasabi and Garden Green. And yes, I cut
the "just for you" image with my paper snips!
April 19, 2011
Still in my pink phase!
Years ago, when I started making cards, I wasn't interested in 3-D projects. Silly me! They
are such fun! I made this tiny purse yesterday. It's just big enough for a fun-size candy bar
or lip balm. It starts with just a 6" x 6" piece of Designer Series paper.
You can see a free video tutorial showing how to make this darling purse on
Frenchie's
blog.
Someday when I have time, I'm going to re-make this card. I snapped a quick picture before I popped it
in the envelope, and my photography leaves much to be desired! This card uses the emboss resist technique
with one of my favorite sets, "Thoughts and Prayers."
April 8, 2011
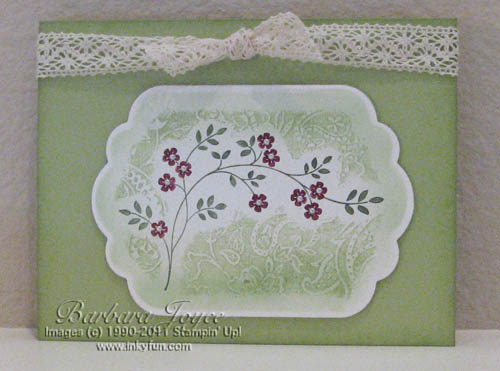
I almost didn't order the set, "Bliss," which was available for free
during Sale-A-Bration. Now I'm so glad I did! I saw this card (well, almost the same) on the
blog of Dawn Olchefske, and I fell in love with it and had to make one for myself. The
big design in the background is done with the "Rock and Roll " technique, using
a single color of ink. First you ink up the stamp, then stamp off onto scrap paper, then
roll just the edges of the stamp into the ink pad again, then stamp. This gives a dark
edge to the motif, while the center is lighter. You can hardly see it, but the background
of the card is also stamped with the same motif, in the same color ink as the cardstock. I
used Concord Crush for my main color.
Newer Posts Older Posts
|